The weekend turned out to be a good time for knitting, and yet, I'm in one of those stages where everything is in the middle and the end is not yet in sight.
The New Day socks are coming along. I want to use up all the Lola, so I put the first sock on stitch holders and cast on the second. Clearly I don't have enough sock needles.
I thought the heel felt a bit thin, even though the yarns are very nearly the same weight. But I figured that working the back in heel stitch couldn't hurt.
Saturday I spent hanging out at the Lowell Folk Festival, eating fabulous ethnic food and listening to music. Prime knitting time. There were a lot of good groups, but I think my favorite was a workshop showcasing various percussive dance traditions. They had Ottawa River Valley step, Irish step, Carolina flatfooting, American tap and Quebec step dancing. They did a couple of tunes where they all got up and danced. The tap guys had the hardest time, being furthest away from the more Celtic traditions, but they were good sports about it. I shot a short video clip- the tap guy is first, then the Irish dancer:
(Blogger didn't like the video link, but I think I've successfully set it up so if click on the picture, you'll see the video.)
And then on Sunday, we hosted a birthday party for a friend. Lots of sitting, chatting and knitting there too. (Which makes it all the more mysterious that things aren't further along...possibly there was more chatting and less knitting than I recall.)
Woats declined to help with the knitting, but was clearly filled with party spirit. (There's a bunch of balloons on the other end of those ribbons.)
Fortunately, certain people with no idea of what constitutes a good time intervened before any ribbon was ingested. It was not for want of trying, however!
Wednesday, July 30, 2008
Thursday, July 24, 2008
Open and Shut
So, at the end of the last post, we had a correctly-sized door with solid edges, the hollow bits having been filled in by scrap lumber. I'm told by just about every carpenter I know that putting the door frame in first and then trying to hang the door is extremely difficult. The door needs to be straight and plumb on three axes- up and down, side to side, and in/out.
Fortunately, there isn't any need to do that. My plan (on advice received)was to build a door frame and 'pre-hang' the door. I cut a top lintel a bit wider than the door, and side pieces a little longer than the door-plus-lintel combination. Then I test fit the whole mess in the door opening. Several times. (This involved a lot of trying to balance three boards at once while cursing and dropping them. I believe that part could be omitted, though I'm not sure how.)
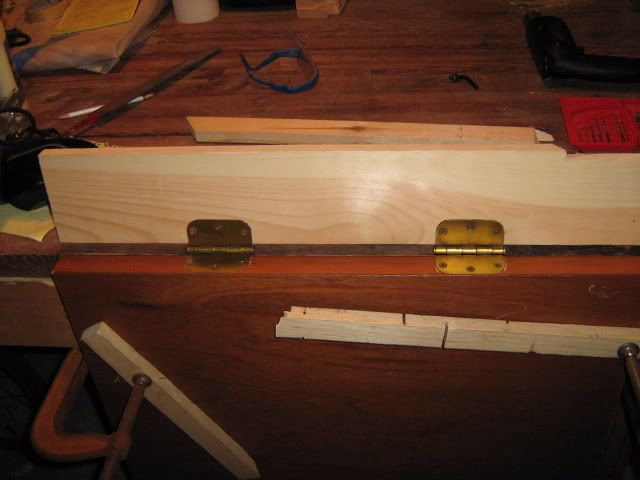
Then it was time to mortise hinges. (The mortise is the little recess on the door and doorframe that the hinge fits into so that there's room to close the door without leaving a huge gap on the hinge side.) This was a part of the project to which I devoted a lot of thought. Traditionally mortising is done with a chisel. Which not only I didn't have, but I strongly suspected that doing it well would take a fair bit of practice that I also didn't have. But I do have a router, and with some thought, I came up with a jig to let me produce mortises the right size for my hinges. After carefully measuring locations on both the frame and the door, I cut.
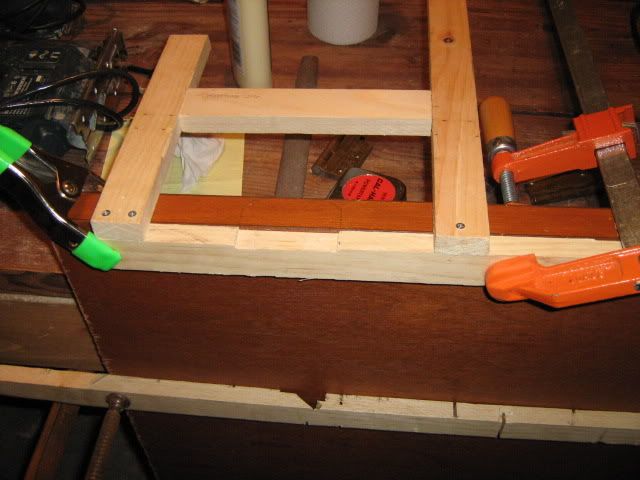
I would strongly recommend not wearing a shirt with a low neckline for this operation , as it generates a lot of sawdust. And here's the doorframe.
With the door now hinged to one side of the doorframe, I nailed the remaining pieces of the doorframe into a U-shape around the door and laid the whole thing flat on the table. That meant the the door and frame were all on the same level. I took strips of trim and nailed them to the frame behind the door to act as a jamb. (That being the stop that prevents the door from getting pushed into the closet and ripping the hinges out of the wood. Never underestimate leverage.)
Now was another good time to recheck the fit. And a good thing I did, since the door hole wasn't really square, and I'd been a little too aggressive in trying to get a tight fit. Some filing and planing of the outside of the door frame ensued. Once everything fit, I took the door out of the frame and stained the frame (never stain in situ if you can avoid it, that's my plan). Also, I stained the edges of the door where I'd filled in the scrap lumber.
Then it was finally time to install. This is another highly technical procedure. You put the door into the opening, hammer in bits of wedge-shaped scrap lumber to keep it from moving around, realize that the door is too tight. Curse a lot. Take the wedges out and cut them thinner. Put a level on it. Realize that the hammering has disturbed the level. Finally get everything precariously into balance, and put a bunch of long nails through it to hold the frame in the door opening. Then obsessively recheck levels and finally? Open and shut the new door twenty or thirty times- just because you can.
And last but not least, you cut some trim and nail it over the juncture of the door frame and door opening to hide the mess of wedges and nails back there. Just on the outside, because fortunately I'm not so anal as to worry about what someone hiding in the closet with think of my workmanship. (It was kind of a relief to discover this, after the whole painting thing.) The trim incidentally, was the bit that took a long hiatus before I finally finished.
I used a spare knob I had lying around, since this was such a funny little space and so low, I wasn't concerned about having an actual knob that turned. I also adjusted it to have just enough friction with the door frame to hold it closed without the need for a latch. The other two doors I mentioned? They were a little larger, and so I actually cut out the part of the hollow-core door that had the doorknob, and put in the strike plate, using the router again to cut out the space where the latch goes. Those got finished first, due to the one opening into the dining room (and therefore public) area of the house.
And boy, is it good to have this done. I can't say that hanging doors is the sort of thing I'd recommend to someone looking for a good time. But in the interest in saving a fortune in custom carpentry, I'm very glad to have done it. Or in other words? It feels so good when you stop.
Fortunately, there isn't any need to do that. My plan (on advice received)was to build a door frame and 'pre-hang' the door. I cut a top lintel a bit wider than the door, and side pieces a little longer than the door-plus-lintel combination. Then I test fit the whole mess in the door opening. Several times. (This involved a lot of trying to balance three boards at once while cursing and dropping them. I believe that part could be omitted, though I'm not sure how.)
Then it was time to mortise hinges. (The mortise is the little recess on the door and doorframe that the hinge fits into so that there's room to close the door without leaving a huge gap on the hinge side.) This was a part of the project to which I devoted a lot of thought. Traditionally mortising is done with a chisel. Which not only I didn't have, but I strongly suspected that doing it well would take a fair bit of practice that I also didn't have. But I do have a router, and with some thought, I came up with a jig to let me produce mortises the right size for my hinges. After carefully measuring locations on both the frame and the door, I cut.
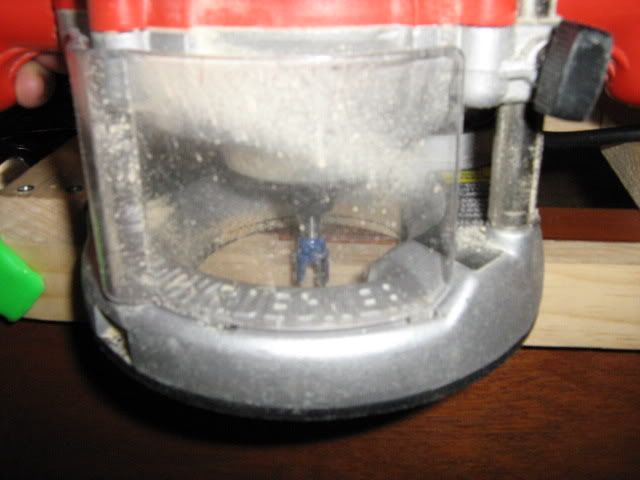
I would strongly recommend not wearing a shirt with a low neckline for this operation , as it generates a lot of sawdust. And here's the doorframe.
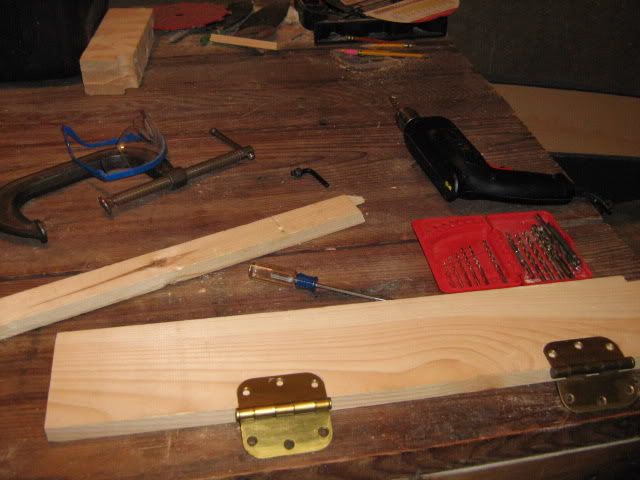
With the door now hinged to one side of the doorframe, I nailed the remaining pieces of the doorframe into a U-shape around the door and laid the whole thing flat on the table. That meant the the door and frame were all on the same level. I took strips of trim and nailed them to the frame behind the door to act as a jamb. (That being the stop that prevents the door from getting pushed into the closet and ripping the hinges out of the wood. Never underestimate leverage.)
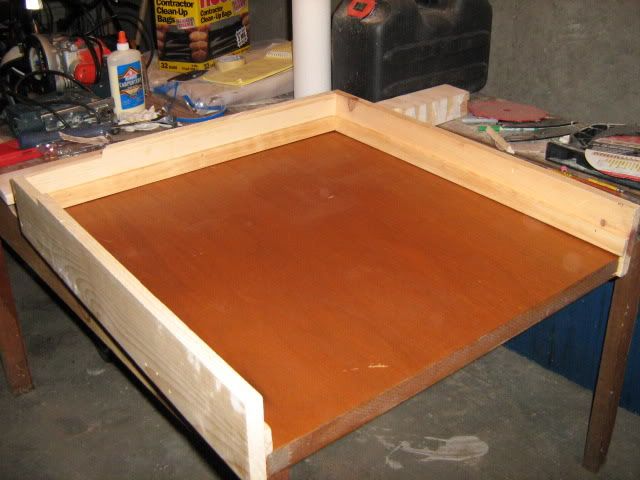
Now was another good time to recheck the fit. And a good thing I did, since the door hole wasn't really square, and I'd been a little too aggressive in trying to get a tight fit. Some filing and planing of the outside of the door frame ensued. Once everything fit, I took the door out of the frame and stained the frame (never stain in situ if you can avoid it, that's my plan). Also, I stained the edges of the door where I'd filled in the scrap lumber.
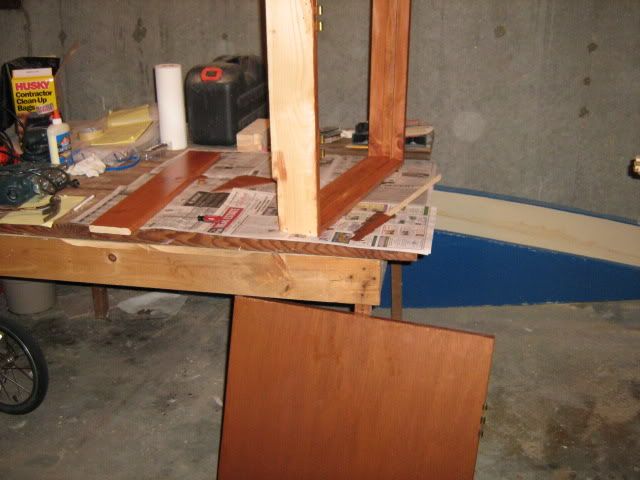
Then it was finally time to install. This is another highly technical procedure. You put the door into the opening, hammer in bits of wedge-shaped scrap lumber to keep it from moving around, realize that the door is too tight. Curse a lot. Take the wedges out and cut them thinner. Put a level on it. Realize that the hammering has disturbed the level. Finally get everything precariously into balance, and put a bunch of long nails through it to hold the frame in the door opening. Then obsessively recheck levels and finally? Open and shut the new door twenty or thirty times- just because you can.
And last but not least, you cut some trim and nail it over the juncture of the door frame and door opening to hide the mess of wedges and nails back there. Just on the outside, because fortunately I'm not so anal as to worry about what someone hiding in the closet with think of my workmanship. (It was kind of a relief to discover this, after the whole painting thing.) The trim incidentally, was the bit that took a long hiatus before I finally finished.
I used a spare knob I had lying around, since this was such a funny little space and so low, I wasn't concerned about having an actual knob that turned. I also adjusted it to have just enough friction with the door frame to hold it closed without the need for a latch. The other two doors I mentioned? They were a little larger, and so I actually cut out the part of the hollow-core door that had the doorknob, and put in the strike plate, using the router again to cut out the space where the latch goes. Those got finished first, due to the one opening into the dining room (and therefore public) area of the house.
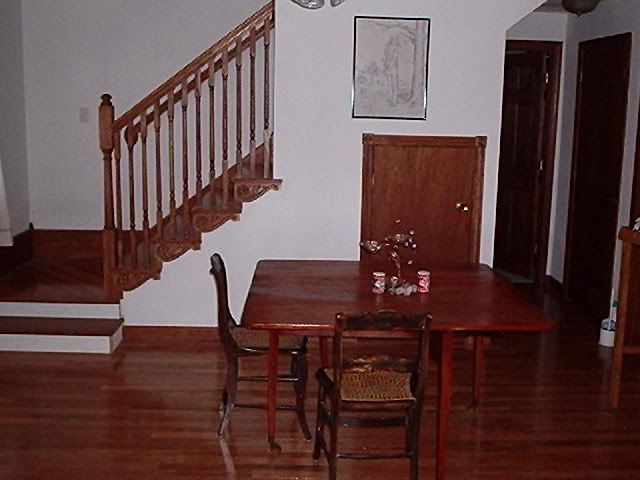
And boy, is it good to have this done. I can't say that hanging doors is the sort of thing I'd recommend to someone looking for a good time. But in the interest in saving a fortune in custom carpentry, I'm very glad to have done it. Or in other words? It feels so good when you stop.
Tuesday, July 15, 2008
The Birth of a Door
Today I finally finished the last step in a fairly extended project. (Not, you understand, that the project has taken so long, but rather I put off doing the last bit for a really embarrassingly long time...)
Anyway, it all started two years ago, when we ripped the roof off our house and built a second story. When we put the stairs up to the new second story, it wasn't practical to put a full-size closet underneath. Rather than give up the space under the stairs, however, I opted to leave the space accessible, with openings for half-height doors on both sides, and an even smaller space under the stairs themselves, accessible from the bedroom. Small is relative of course- we can fit four guitar cases in that space.
Anyway, rather than add custom doors to an already expensive project, I decided to build them myself. I even had a plan- there were several hollow core doors that had been removed during construction and weren't needed (the new doors going in were prehung pine-panel doors).
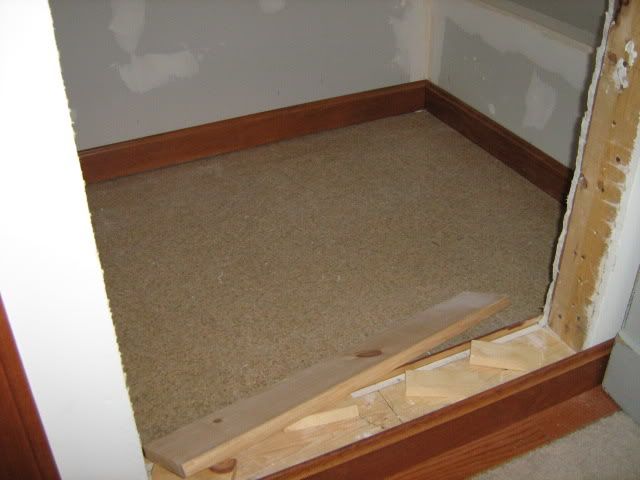
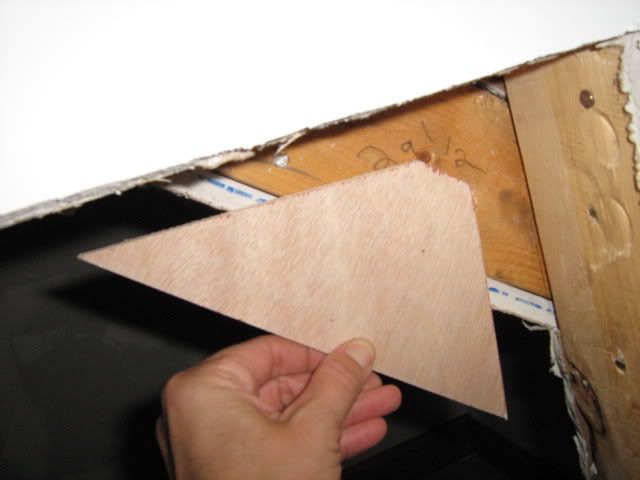
So, I started with a bare opening.
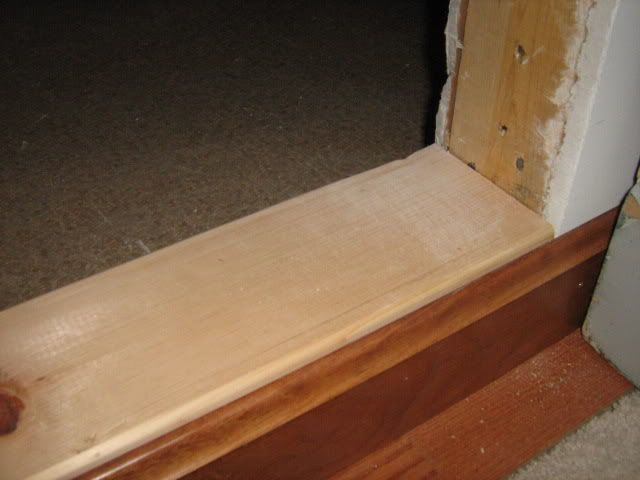
The contractor had installed baseboard across the bottom of the opening, and there was also framing down there. So my first task was to install a few spacers and then put in a sill, that would stick up a bit over the baseboard. The baseboard is pine, so just leaving it hanging in space would be asking for it to get broken. So I rounded over the corners on a length of pine board with the router, and installed the sill:
I also covered bare bits of the stair with a scrap of luan plywood (leftover from the backs of bookcases) and a bit of trim, and painted the inside of the closet. Why? I have no idea. I just felt compelled to do it. Apparently I felt compelled to paint my knees and elbows as well- the space was a tad too deep to paint from the outside- and kind of a tight fit for a painter to crawl into and paint from the inside. But I persevered.
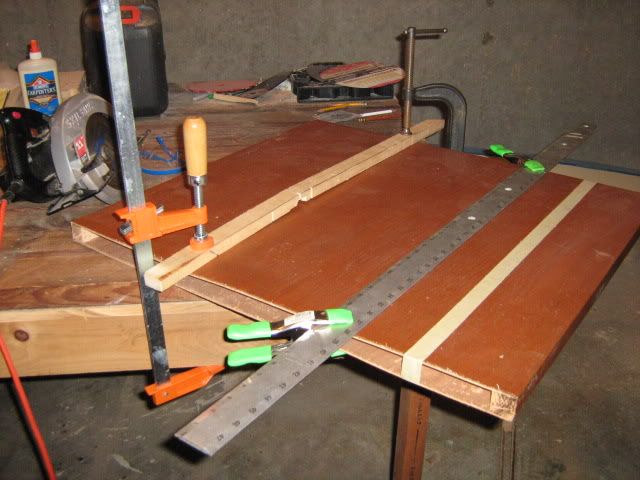
Next step was to figure out the size of the door. Of course the opening wasn't square, so I left a little clearance plus space for the frame and arrived at an estimated size. Then I took a chunk of hollow-core door (left from the other door- I had two spares, but why cut up a door if you don't have to?) and cut it down to finished size.
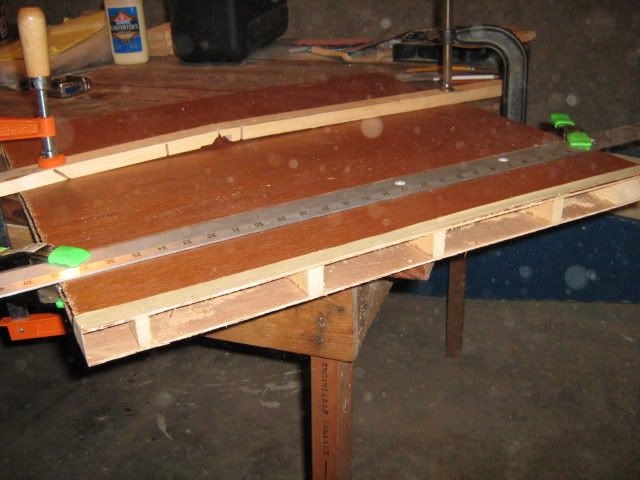
Of course now you can see that the door isn't solid. (Have you ever wondered what was inside a door? I can now tell you that they have spacers made of chipboard or something similar.)
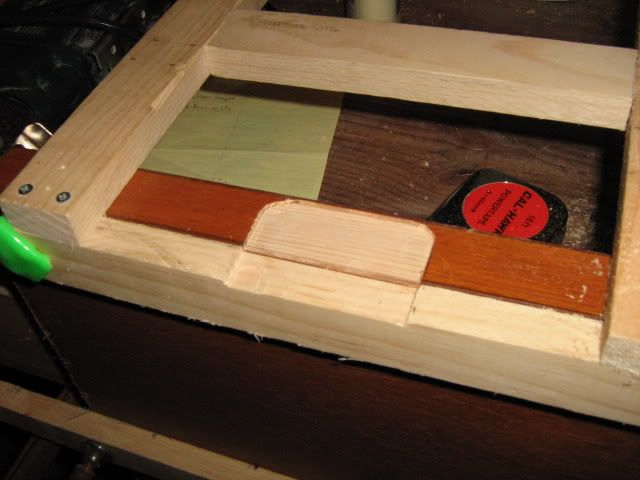
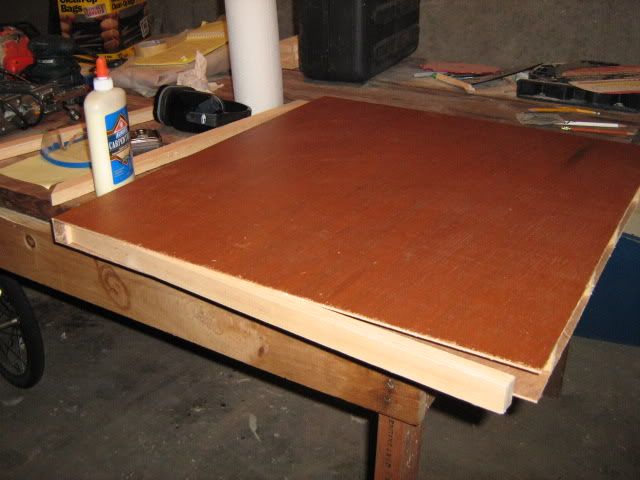
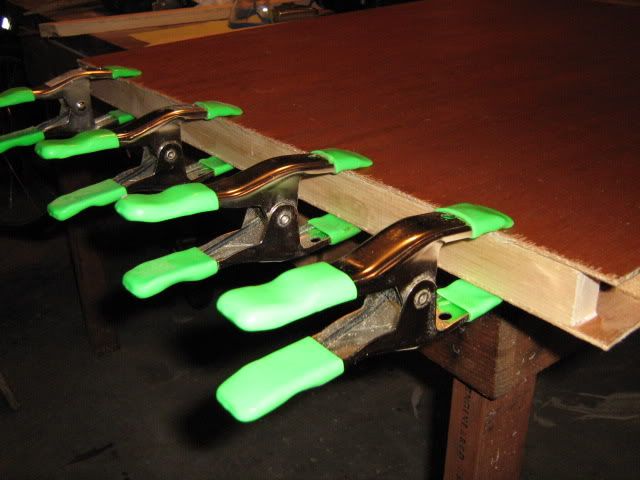
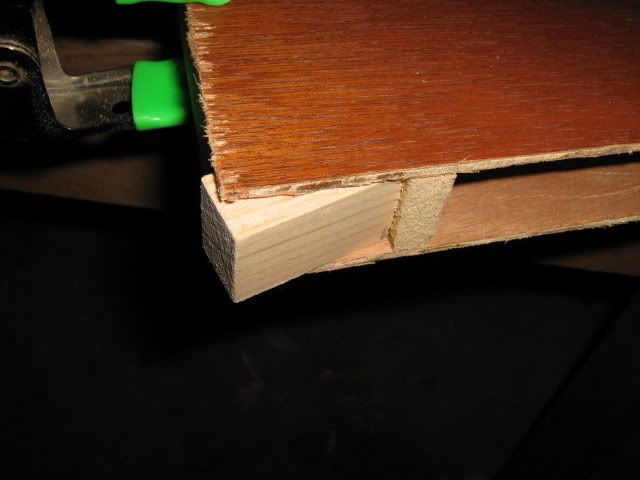
In order to give the door a solid edge all around, I cut pieces of scrap wood to exact size and fitted and glued them all along the unsupported edges.
This was done in stages- mainly because I didn't have enough clamps to do two sides at once- but this is a good place to break. Next post, building the doorframe, mortising hinges, and prehanging the door.
Friday, July 11, 2008
Not Red
So, after searching around, the helpful folks at my LYS introduced me to the perfect partner for Lola, a charming Norwegian yarn called Dale. I think they look stunning together:
I needed a plain project for wandering-around knitting, preferably in a light-colored yarn suitable for knitting in dim restaurants. This yarn is good- it's heavy so I didn't want something heavily patterned and lively enough to be interesting to knit. There's only a bit over 200 yards, so I'm using the Dale for toes, heels and cuffs, to bulk it out a bit. Since I like my socks a bit short in the leg, I should have plenty.
This really isn't a colorway I would have bought myself (it was a blog contest prize), and yet clearly I need to become more adventurous in my yarn-buying because I adore it- the soft peach/yellow/pink is so cheerful and sunny I smile whenever I pick it up. (Thanks, Karen!)
And best of all? It's not red.
Sunday, July 6, 2008
Two, Two Pairs of Red Socks
Throwing a Fourth of July barbecue and hanging out with friends is prime knitting time. (Okay, playing in the pool, not so much.) But I did finish the Manly Red Socks.
I keep having this insane desire to cackle like the Count from Sesame Street, and count, 'One, one pair of red socks! Two, two Christmas gifts complete!' Probably I'm still really underslept.
As I was knitting up to the ankle, I was noticing that the relatively plain fabric had almost no give to it. So I increased a few stitches at the bottom of the foot, and included those with the heel stitches when I worked the short-row heel. Result, the socks do not stretch or pull at the point where the last heel stitches rejoin the leg. I'll have to remember that trick.
And the slight pattern up the side gave me something other than rows to count for length matching purposes (I hate counting rows), and provides a bit of decoration to relieve the plainness. Not that plainness is a big issue, since these socks are destined to disappear into boots, never to be seen again, but you get the drift.
And now, to knit something that's not red!
Wednesday, July 2, 2008
I Have *Got* to Do This More Often...
So yesterday, I did something that I almost never do...I took the day off, and just stayed home. See, like most wage-earning folks, I have a very limited amount of vacation time. And I like to travel, so vacation time tends to be reserved for trips, while routine appointments, local travel and- crucially, appliance deliveries- I tend to deal with by working late a few days to cover the time I'm out of the office.
But not this time. This time, I took an honest-to-goodness day. The pretext was that we were having a new stove delivered. (When bits of the stove fall off? Time to replace it. I think it dated back to the early Pliocene, in any case.) However that happened quite early, which was good, as it forced me to get up. Drinking half a pot of coffee ensured that I stayed up. (Also that I vibrated gently while moving around the house double time.)
And the rest of the day I spent puttering through a series of chores. I grilled a bunch of meat (having pre-cooked meat on hand to speed weeknight dinner preparation is A Good Thing). I cleaned. I did pool maintenance. I checked the wiring of a malfunctioning light, concluded I couldn't fix it, and called the electrician. I swept and cleaned the stairs in preparation for repainting the risers. And for each task I completed? I rewarded myself with a knit break.
Behold:
I have completed the back and started the first sleeve of the gray merino sweater. (Next time I have the bright idea of knitting a surprise Christmas gift for someone I live with, I'm going to do mitts or something...getting enough private knitting time to knit a whole sweater and still keep it a surprise is proving darned tricky.)
And in other news, I turned the heel of the second Manly Red Sock. Yes, that's another Christmas gift, though less surprising (he always gets socks). I'm not going to post a picture because it actually looks rather a lot like the last one. (Very gratifying, that.)
Altogether a lovely day. I really need to do it again sometime.
Subscribe to:
Posts (Atom)